So the last six months have been so crazy with work and more work. I have had little time to craft (or blog). Well, at least a few things have slowed down a bit so I have finally had some time to get back into my mess of a craft room and actually work on some fun projects.
 |
| Here is my display from the Stateline Friends Weaving Retreat where I introduced the new stamp designs. |
As some of you may know, I have been producing my own line of rubber stamps. I started with a few sheets of stamps and after using them myself for a few years I decided to start offering some of them for sale. A year ago I introduced four sets of baskets with accompanying words/sayings. This year I added two more sets. I barely had time to get the new sets made let alone use them, until recently. Even though I haven't had any time to craft that hasn't stopped me from buying more stamps, paper and inks.
 |
| I never do anything small. When I buy paper, I buy a lot... |
I love the new sets of Darcie's and Tim Holtz stamps I picked up. I think they go so well with my basket stamps. Here are two of the cards I made using the new stamps.
While I keep one sample of the cards I make and I usually photograph them to put on Facebook I have never tried taking photos of process, until now.*
I started out stamping a large background image in Ranger Distress Ink, Vintage Velvet on a piece of cream colored card stock.
I then added a strip of butterflies and moths along one side using Dusty Concord.
Here is the panel with both images.
To add a little more interest to the background I added a strip of texture in a contrasting color.
Next I used a blending tool and some more Vintage Velvet to edge the cream colored panel.
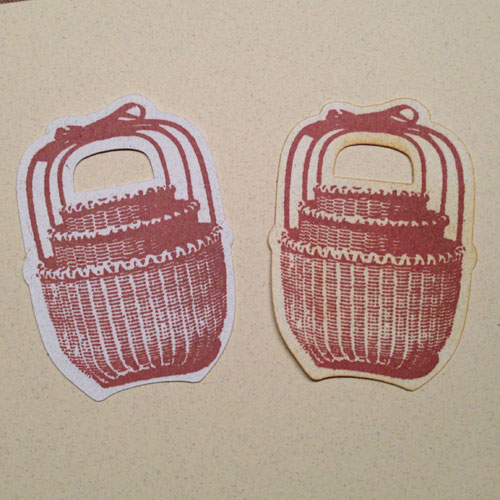
I had stamped and cut these shapes using my Sizzix eClips cutting machine for another project and had a bunch of them left over. They were on a whitish card stock, but I thought if I edged them with the Vintage Velvet they would look fine on the card.
Unfortunately they didn't look like I wanted them to, so I used some Scattered Straw colored Distress Ink and a blending tool to tint the white paper to better match the cream colored background this was going to be layered on.
Since I already had the shape of the basket stamp drawn using Adobe Illustrator and brought into the eCal software that came with my eClips machine I was easily able to cut a sheet of shadows out of purple card stock.
To assemble the cards I layered the stamped pane (I added "Shaker" to the lower left-hand corner) onto a purple fold-over.
To add a bit more dimension to the card I used a square of foam tape to raise the basket off of the surface of the card.
I usually make a few modifications after I make the first design. Here you can see how the baskets on the white paper stood out in too much contrast for my taste. I also initially stamped the word "Shaker" in the same purple as the butterflies, but I wanted to add some more brown into the card. When I make cards I always make a bunch at the same time. Once I have all my elements cut and my design figured out, it is just as easy to make a stack as it is to make one.
*Sorry if all of the photos are not the sharpest, I took all of these just with my iPhone.